
Headlight Assembly Replacement: Reasons, Signs, Tips, Types, and More

Summary:
Headlight assemblies are essential components of any vehicle, providing drivers with visibility and safety during nighttime and low-light driving conditions. Over time, headlight assemblies may become worn or damaged, leading to reduced visibility and safety concerns. In this article, we'll explore the reasons for replacing a headlight assembly, signs that indicate the need for replacement, tips for maintaining headlight assemblies, different types of headlight assemblies and their pros and cons, common mistakes to avoid when replacing a headlight assembly, safety considerations, step-by-step instructions for replacement, tools and materials needed, cost considerations, and frequently asked questions.
Reasons for Replacing a Headlight Assembly:
There are several reasons why you may need to replace your vehicle's headlight assembly. One of the most common reasons is damage or wear and tear. This can be caused by a variety of factors, including accidents, weather, and exposure to UV rays. Another reason to replace a headlight assembly is if it is not functioning properly. This can lead to reduced visibility and safety concerns, which can be dangerous for you and other drivers on the road.
Signs That Indicate the Need for Replacement:
There are several signs that indicate the need for headlight assembly replacement. One of the most obvious signs is a dim or flickering headlight. This can be caused by a failing bulb or a damaged headlight assembly. Another sign is a cracked or broken headlight lens. This can allow moisture and debris to enter the headlight assembly, which can cause damage and reduce visibility. Other signs include yellowed or hazy headlights, which can reduce the amount of light that is emitted.
Tips for Maintaining Headlight Assemblies to Extend Their Lifespan:
To extend the lifespan of your headlight assembly, it's important to follow some maintenance tips. One of the most important tips is to keep your headlight assemblies clean and free from debris. This can be done by washing them with soap and water, or by using a specialized headlight cleaner. Another tip is to check your headlights regularly for signs of damage or wear and tear. If you notice any issues, it's important to address them as soon as possible.
Different Types of Headlight Assemblies and Their Pros and Cons:
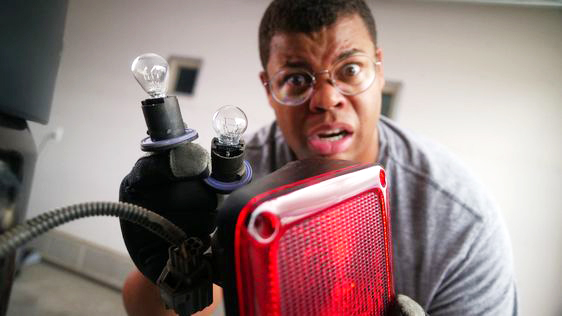
There are several types of headlight assemblies available on the market, each with their own pros and cons. The most common types include halogen, LED, and HID (high-intensity discharge) headlights. Halogen headlights are the most affordable and widely used type, but they may not be as bright as other types. LED headlights are more energy-efficient and longer-lasting, but they can be more expensive. HID headlights are the brightest type, but they require special ballasts and are more expensive to replace.
Common Mistakes to Avoid When Replacing a Headlight Assembly:
When replacing a headlight assembly, it's important to avoid common mistakes. One of the most common mistakes is not properly aligning the headlight assembly, which can cause visibility issues. Another mistake is using the wrong tools or materials, which can damage the headlight assembly or other parts of the vehicle.
Safety Considerations When Replacing a Headlight Assembly:
Replacing a headlight assembly can be a dangerous task, especially if you're not familiar with the process. It's important to wear protective gear, such as gloves and safety glasses, and to follow proper safety procedures.
Reasons for Replacing a Headlight Assembly:
A properly functioning headlight assembly is essential for safe driving. Headlights not only help you see the road ahead, but they also make you visible to other drivers on the road. If you notice any issues with your headlights, it may be time to consider replacing the headlight assembly. Here are some common reasons why you might need to replace your headlight assembly.
Damaged or Cracked Lens. One of the most common reasons to replace a headlight assembly is a damaged or cracked lens. Over time, the lens can become faded, scratched, or pitted from exposure to the elements. Additionally, rocks or other debris can hit the lens and cause cracks or other damage. A damaged lens can reduce the effectiveness of the headlight, making it difficult to see the road ahead.
Burned Out Bulbs. Another common reason for headlight assembly replacement is a burned out bulb. Bulbs can burn out over time, especially if they are used frequently or exposed to harsh conditions. If one or both of your headlights are not working, it's important to replace the bulb as soon as possible to ensure safe driving.
Electrical Issues. If you are experiencing electrical issues with your headlights, such as flickering or dimming, it may be a sign of a problem with the headlight assembly. Faulty wiring or a damaged electrical component can cause these issues, and in some cases, the entire headlight assembly may need to be replaced to fix the problem.
Fogged or Moisture-Filled Housing. If your headlight assembly is fogged or filled with moisture, it can significantly reduce the effectiveness of the headlights. Moisture can accumulate inside the housing due to cracks or damaged seals. In some cases, the headlight assembly can be repaired, but if the damage is severe, a replacement may be necessary.
Upgrading to LED Headlights. Many drivers choose to upgrade their headlights to LED for improved visibility and performance. If you are looking to upgrade your headlights, you may need to replace the entire headlight assembly to accommodate the new LED bulbs.
Signs That Indicate the Need for Replacement:
Headlights are one of the most important safety features on a vehicle, providing visibility in low-light conditions and alerting other drivers of your presence on the road. Over time, headlight assemblies can become worn or damaged, which can lead to reduced visibility and potential safety hazards. It's important to be aware of the signs that indicate a need for headlight assembly replacement.
Dim or Flickering Lights. One of the most obvious signs that your headlight assembly needs to be replaced is if the lights are dim or flickering. This can be caused by a variety of issues, including a failing bulb, a loose connection, or a damaged headlight lens.
Moisture Buildup. If you notice moisture buildup inside your headlight assembly, it's a sign that the seal has failed and needs to be replaced. Moisture buildup can lead to corrosion, which can damage the electrical components of the headlight and potentially cause a short circuit.
Cracks or Damage. If your headlight assembly is cracked or damaged in any way, it's important to have it replaced as soon as possible. Cracks or damage can allow moisture to enter the assembly, which can cause electrical problems or even damage the bulb.
Yellowing or Cloudiness. Over time, headlight lenses can become yellowed or cloudy due to exposure to the elements. This can reduce the brightness of the headlights and make it more difficult to see while driving at night. If your headlight lenses are yellowed or cloudy, it's time to replace the assembly.
Failed Inspection. If your vehicle fails a state inspection due to a malfunctioning headlight assembly, it's important to have it replaced immediately. Driving with a malfunctioning headlight assembly is not only unsafe, but can also result in a ticket or fine.
Tips for maintaining headlight assemblies to extend their lifespan:
Headlight assemblies are an essential part of any vehicle, providing necessary visibility during night-time driving and in low light conditions. Maintaining them properly can extend their lifespan, ensuring they work effectively and efficiently. Here are some tips for maintaining headlight assemblies:
-
Clean the headlights regularly: Dirt, dust, and debris can accumulate on the headlights, reducing their brightness and effectiveness. Regularly cleaning them with a soft cloth and a mild cleaning solution can help keep them clear and bright.
-
Use a protective film: Applying a protective film to the headlights can help prevent scratches, dings, and other damage. These films are easy to apply and can significantly extend the lifespan of the headlight assembly.
-
Check the bulbs: The bulbs inside the headlight assembly can wear out over time, resulting in reduced brightness or complete failure. Regularly checking the bulbs and replacing them as necessary can help keep the headlights functioning properly.
-
Check the electrical connections: Faulty electrical connections can cause the headlights to malfunction. Check the connections for any loose or corroded wires and repair them as needed.
-
Keep the headlights dry: Moisture can accumulate inside the headlight assembly, leading to foggy or hazy headlights. Ensuring the headlights are dry and free of moisture can prevent this from happening.
-
By following these simple tips, you can extend the lifespan of your headlight assemblies and keep them functioning properly. Regular maintenance can also save you money in the long run by reducing the need for costly replacements or repairs.
-
Avoid harsh chemicals: Harsh chemicals such as ammonia and bleach can damage the plastic on the headlight assembly. Instead, use a mild soap and water solution or a specialized headlight cleaner to keep them clean.
-
Park in the shade: Parking your car in direct sunlight for long periods can cause the plastic on the headlight assembly to fade and crack. Parking in the shade or under a carport can help protect the headlights from sun damage.
-
Keep your car covered: When not in use, consider covering your car with a car cover to protect it from the elements. This can help prevent damage to the headlight assembly from exposure to rain, snow, or hail.
-
Replace damaged lenses: If the plastic lenses on the headlight assembly become damaged or cracked, it's important to replace them as soon as possible. Damaged lenses can cause moisture to enter the assembly, leading to foggy or hazy headlights.
-
Professional restoration: If your headlight assemblies are severely damaged or foggy, consider professional restoration services. These services can restore the headlights to like-new condition, improving visibility and safety on the road.
-
Proper maintenance of your headlight assemblies is important for your safety and the safety of others on the road. By following these tips, you can extend the lifespan of your headlights and keep them working effectively and efficiently.
Different Types of Headlight Assemblies and Their Pros|Cons:
Headlight assemblies are an essential component of any vehicle. They provide illumination for driving in low-light conditions and are crucial for ensuring the safety of both the driver and passengers. There are several different types of headlight assemblies available, each with their own advantages and disadvantages. In this article, we will discuss the different types of headlight assemblies and their pros and cons.
Halogen Headlights: Halogen headlights are the most common type of headlight found on vehicles. They are relatively inexpensive and offer a bright and clear light output. Halogen bulbs are filled with a halogen gas, which enhances the brightness of the bulb. They are also easy to replace when they burn out. However, halogen bulbs have a shorter lifespan compared to other types of bulbs and may not provide the same level of illumination as other types of headlights.
Xenon Headlights: Xenon headlights, also known as High-Intensity Discharge (HID) headlights, are brighter and more efficient than halogen headlights. They use xenon gas to produce a bright, white light. Xenon headlights are more expensive than halogen headlights but have a longer lifespan and are more energy-efficient. However, they require a special ballast to regulate the amount of power that the bulb receives, which can be costly to replace if it fails.
LED Headlights: LED headlights are becoming increasingly popular due to their long lifespan and energy efficiency. They are more expensive than halogen headlights but use less power and provide a brighter and more even light output. LED headlights also offer more design options and can be used to create unique lighting effects. However, they can be difficult to replace if they fail, and may not provide the same level of illumination as xenon headlights.
Projector Headlights: Projector headlights use a lens to focus the light and produce a sharper and more focused beam. They are often used on luxury vehicles and are available in both halogen and xenon options. Projector headlights provide better illumination than traditional reflector headlights and are more energy-efficient. However, they can be more expensive to replace if they fail.
Adaptive Headlights: Adaptive headlights use sensors to adjust the direction of the beam based on the vehicle's speed and steering angle. They are designed to improve visibility while driving at night or in low-light conditions. Adaptive headlights are available in both xenon and LED options and provide better illumination and safety than traditional headlights. However, they are more expensive than other types of headlights and may require specialized installation.
Common Mistakes to Avoid When Replacing a Headlight Assembly:
Replacing a headlight assembly can be a daunting task, especially for those who are not experienced with automotive repair. However, with the right tools and knowledge, it can be done successfully. That being said, there are a few common mistakes that people make when replacing a headlight assembly. In this article, we will discuss these mistakes and how to avoid them.
Forgetting to Disconnect The Battery. Before starting any electrical work on your vehicle, it is important to disconnect the battery to prevent any electrical shocks or damage to the electrical system. It is a common mistake to forget to do this before replacing a headlight assembly. Make sure to disconnect the negative cable from the battery before starting the replacement process.
Not Properly Aligning The Headlight Assembly. Headlight alignment is crucial for proper illumination on the road. A common mistake is not properly aligning the new headlight assembly, which can result in poor visibility and potential safety hazards. Take the time to properly align the new headlight assembly according to the manufacturer's instructions.
Using Incorrect Tools. Using the wrong tools for the job can lead to damage to the headlight assembly or other parts of the vehicle. Make sure to use the appropriate tools, such as a socket wrench or screwdriver, to avoid damaging any components.
Forgetting To Test The New Headlight Assembly. After the installation of the new headlight assembly, it is important to test it to ensure that it is functioning properly. A common mistake is forgetting to do this, which can result in further problems down the line. Before finishing up the replacement process, make sure to test the new headlight assembly by turning on the headlights and checking for proper illumination.
Rushing The Replacement Process. Replacing a headlight assembly can be time-consuming, but rushing the process can lead to mistakes and potential safety hazards. Take the time to carefully follow the manufacturer's instructions and double-check your work to ensure a successful and safe replacement.
Safety Considerations When Replacing A Headlight Assembly
Replacing a headlight assembly can be a relatively simple task, but it’s important to keep safety in mind throughout the process. Here are some key safety considerations to keep in mind when replacing a headlight assembly:
Turn off the engine and remove the keys: Before starting any work on your vehicle, be sure to turn off the engine and remove the keys from the ignition. This will help prevent any accidental starts or movement of the vehicle.
Use protective gear: It’s always a good idea to use protective gear when working on your vehicle. Wear gloves to protect your hands and safety glasses to protect your eyes from any debris or flying parts.
Use jack stands: If you need to raise your vehicle to access the headlight assembly, be sure to use jack stands to support the weight of the vehicle. Never rely on a jack alone to support the weight of the vehicle.
Be mindful of electrical connections: When working with the headlight assembly, be sure to disconnect the electrical connections before removing the assembly. This will help prevent any electrical shocks or damage to the wiring.
Follow manufacturer instructions: Always follow the manufacturer instructions for replacing the headlight assembly. This will ensure that you are performing the replacement correctly and safely.
Test the new assembly: After installing the new headlight assembly, be sure to test it to ensure that it is working properly. Turn on the headlights and verify that both low beams and high beams are functioning correctly.
By keeping these safety considerations in mind, you can ensure that your headlight assembly replacement is completed safely and successfully. Remember, if you are not comfortable performing the replacement yourself, it’s always best to seek the assistance of a qualified mechanic.
Cost Considerations For Headlight Assembly Replacement:
When it comes to replacing a headlight assembly, cost is a major consideration for many car owners. The price of replacement can vary widely depending on several factors, including the make and model of the vehicle, the type of headlight assembly needed, and the labor involved in the replacement process.
Factors Affecting the Cost of Headlight Assembly Replacement.
Make and Model of Vehicle: The make and model of a vehicle can have a significant impact on the cost of headlight assembly replacement. Some vehicles require more specialized or expensive parts, while others may have simpler assemblies that are easier to replace.
Type of Headlight Assembly: There are several types of headlight assemblies available, including halogen, LED, and HID. Each type of assembly has its own cost range, with halogen being the least expensive and HID being the most expensive.
Labor Costs: The cost of labor can vary depending on the shop or mechanic you choose. Some may charge a flat rate for headlight assembly replacement, while others may charge by the hour.
Warranty Coverage: If your vehicle is still under warranty, the cost of headlight assembly replacement may be covered. Be sure to check your warranty coverage before paying for any repairs.
Tips for Keeping the Cost of Headlight Assembly Replacement Low.
Shop Around: Don't be afraid to shop around for the best price on headlight assembly replacement. Get quotes from multiple mechanics or shops to compare pricing and ensure you're getting the best deal.
Choose the Right Type of Assembly: While HID headlights may be the most visually appealing, they also come with a higher price tag. Consider opting for a less expensive option like halogen or LED if cost is a concern.
Do It Yourself: If you're comfortable with car repairs, you may be able to save money by replacing the headlight assembly yourself. Be sure to research the process thoroughly before attempting any repairs.
Take Preventative Measures: To extend the life of your headlight assembly and avoid the need for replacement, consider taking preventative measures like keeping the headlights clean and avoiding rough driving conditions.
FAQs About Headlight Assembly Replacement:
Replacing a headlight assembly can be a daunting task for those who have never done it before. Here are some frequently asked questions and their answers to help make the process easier:
Q. What is a headlight assembly?
A headlight assembly is a complete unit that contains the headlight bulb, lens, reflector, and housing. It is the part of the car that emits light to illuminate the road ahead.
Q. When should I replace my headlight assembly?
There are several signs that indicate it's time to replace your headlight assembly. These include:
The headlight lens is cracked, foggy, or yellowed
The headlight bulb is not working
The headlight beam is dimmer than usual
The headlight assembly is damaged or broken
Q. Can I replace just the headlight bulb instead of the whole assembly?
In some cases, you can replace just the headlight bulb instead of the whole assembly. However, if the lens, reflector, or housing is damaged, it's best to replace the entire assembly.
Q. How much does it cost to replace a headlight assembly?
The cost of replacing a headlight assembly can vary depending on the make and model of your vehicle, as well as where you purchase the part. On average, the cost can range from $100 to $500.
Q. Can I replace a headlight assembly myself?
Yes, you can replace a headlight assembly yourself if you have the right tools and knowledge. However, if you are not comfortable working on your car, it's best to have a professional handle the replacement.
Q. What tools do I need to replace a headlight assembly?
The tools you'll need can vary depending on the make and model of your vehicle, but typically include a socket wrench, screwdriver, pliers, and a trim removal tool.
Q. Are there any safety considerations when replacing a headlight assembly?
Yes, safety is important when working on your car. Be sure to disconnect the battery before starting work, wear gloves and eye protection, and avoid touching the bulb with your bare hands to prevent oil from your skin from damaging the bulb.
Replacing a headlight assembly may seem intimidating, but with the right knowledge and tools, it can be a manageable task. If you're unsure about doing it yourself, it's always best to consult a professional mechanic.
Related Post


Subscribe to our weekly newsletter!
Get coupons from your favorite retailers sent to your inbox at the beginning of every week.
You can cancel anytime.
Comment
leave comment